Spring is a season of renewal and rejuvenation in Utah, as homeowners emerge from the long winter months and begin preparing their homes for the warmer weather ahead. One important task that should not be overlooked is a thorough radon check. Radon is an invisible, odorless, and tasteless gas that can pose serious
health risks if concentrated at high levels inside homes. With its potential to cause
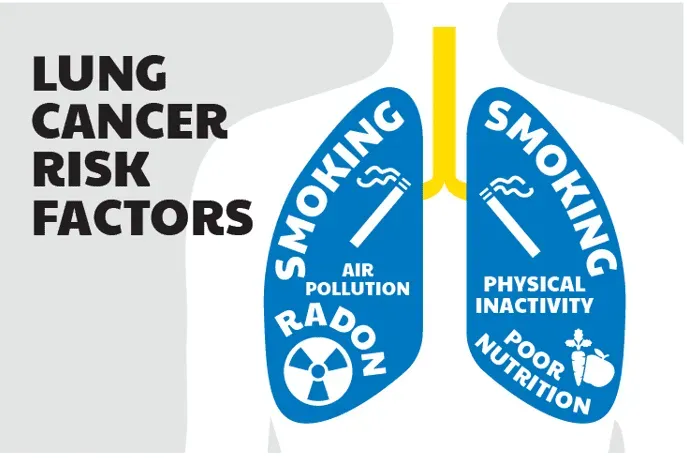
lung cancer despite being naturally occurring, it is crucial to understand how to identify radon risks and undertake effective measures to safeguard your family’s health.
In this comprehensive guide, we will provide an in-depth look at how to perform a radon check in your home this spring, explain the nature of radon gas and its risks, and offer clear, actionable steps for preparing and mitigating any issues that might be discovered. Whether you are a seasoned homeowner or new to the concept of radon testing, this information will empower you with the tools needed to ensure that your living space remains safe and healthy.
Get a Free Quote
Preparing Your Home for a Radon Check
Before you begin a radon check in your home, it is important to prepare your living space to ensure that the test results will be as accurate as possible. Follow these preparatory steps for a more effective testing process:
- Identify Testing Areas: Locate key areas in your home that are most at risk, such as basements, crawl spaces, and ground-level living areas.
- Seal Openings: Temporarily close and seal any windows, doors, or vents in the testing area to prevent outside air from interfering with the results.
- Clear Clutter: Remove any clutter that may obstruct air flow or interfere with the placement of testing devices.
- Maintain Consistent Temperature: As radon levels can be affected by temperature and ventilation, try to maintain typical living conditions during the testing period.
Taking these steps will help create an environment where radon gas can be measured reliably, reducing variations that might occur if the home were subject to unusual air movements or temperature changes.
How to Conduct a Radon Check: Methods and Tools
There are several methods to conduct a radon check, ranging from
do-it-yourself kits to professional monitoring services. Understanding the different testing options allows you to choose the method that best suits your home and lifestyle.
Two common testing methods include:
Short-Term Testing:
Short-term tests typically last from 2 to 7 days. They are useful for obtaining a quick snapshot of the radon levels in your home. These tests are often conducted by placing a small testing device in the lowest livable area of your home. While short-term tests are convenient, they may be influenced by fluctuating weather conditions and changes in the home’s ventilation.
Long-Term Testing:
Long-term testing, usually conducted over a period of 90 days or more, provides a more accurate representation of the radon exposure over different seasons. This type of testing is beneficial if you want to understand the average radon level in your home rather than a single moment in time.
Both testing methods have their advantages, and the choice between them depends on how quickly you need results and your particular living conditions. For those who want immediate feedback, a short-term test may suffice. However, if you are aiming to understand how radon levels might fluctuate with seasonal changes, a long-term test will offer more detailed insights.
Reading and Interpreting Radon Test Results
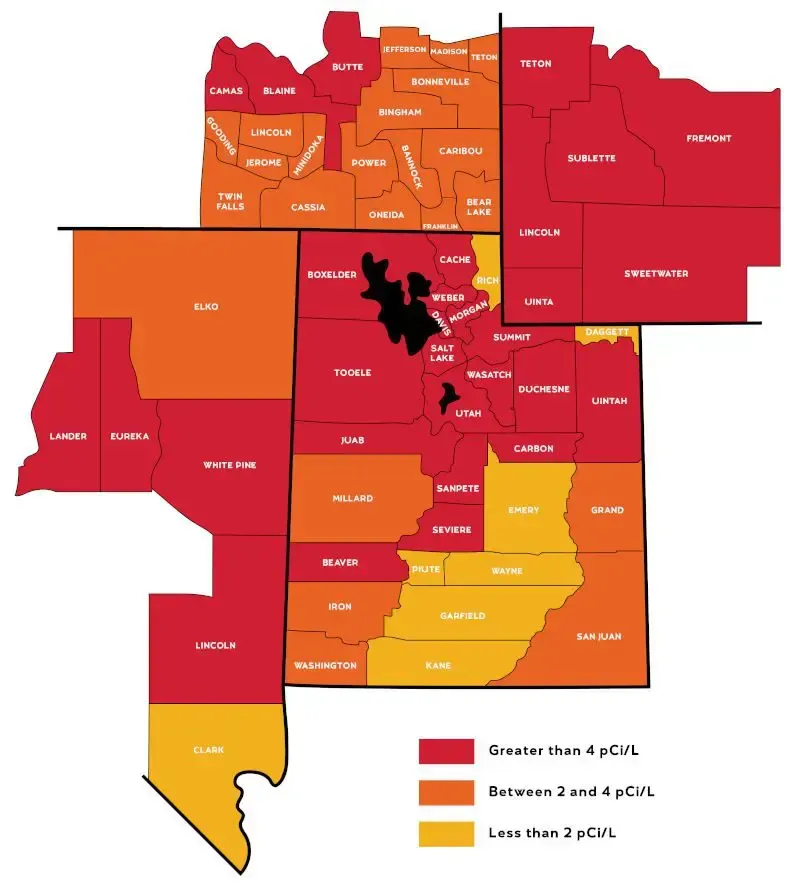
Once you have completed a radon test, it is important to know how to interpret the results. Radon levels are measured in picocuries per liter (pCi/L) of air. The Environmental Protection Agency (EPA) recommends taking action if radon levels are found to be at or above 4 pCi/L.
Consider the following guidelines when evaluating your test results:
- Below 2 pCi/L: This level is generally considered safe, and no further action is required. Regular testing should still be performed to monitor potential changes.
- 2-4 pCi/L: Although levels in this range are below the recommended action level, some experts suggest that lower exposure is always better. Consider retesting during another season to confirm consistent low levels.
- 4 pCi/L and Above: It is strongly recommended to undertake mitigation measures. Professional radon mitigation services can help lower radon levels effectively.
If you have any uncertainty about the test results or need professional advice on the next steps, please feel free to
contact our experienced team for personalized guidance.
Spring Radon Check: Step-by-Step Guide
For those who prefer a do-it-yourself approach or wish to understand the process before calling in professionals, follow this step-by-step guide to ensure a thorough radon check:
Step 1: Planning and Preparation
Before initiating the test, map out the areas in your home where radon might accumulate. This includes basements,
crawl spaces, and the lowest occupied levels. Make sure to clear these spaces and close any windows or vents that could interfere with the test.
Step 2: Choosing the Right Testing Method
Decide whether a short-term or long-term testing device best matches your needs:
- Short-Term Testing: Ideal for quick assessments, especially if you suspect a spike after the winter months.
- Long-Term Testing: Provides a continuous measurement over different weather conditions and daily routines.
Step 3: Setting Up the Testing Device
Follow the manufacturer’s instructions carefully. Place the device in an area away from drafts, windows, and exterior walls to avoid skewed results. Typically, the device should be positioned on a flat surface at breathing level to capture a representative sample of the air.
Step 4: Monitoring and Data Collection
Leave the testing device in place for the recommended duration. Make sure that the area remains closed off as per the instructions. Avoid making any changes to the interior environment that could affect the airflow or temperature during the test period.
Step 5: Reading the Results
After the testing period, retrieve the device and follow the guidelines provided to interpret the results. Compare your readings against the EPA’s action levels to determine whether mitigation is necessary.
Step 6: Taking Action Based on Results
If readings are above recommended levels, explore options for immediate remediation:
- Contact a professional radon mitigation service for an in-depth evaluation.
- Consider implementing cost-effective measures such as sealing floors and increasing ventilation.
- Plan for repeat testing to ensure that any mitigation efforts have been successful.
When to Seek Professional Help
While many homeowners may be able to carry out preliminary radon checks on their own, there are situations where professional assistance is necessary:
- High Test Readings: If your radon levels are consistently above 4 pCi/L or show significant fluctuations, professional testing and mitigation should be your next step.
- Complex Home Structures: Homes with unique architectural features or unconventional foundations may benefit from professional assessments to ensure comprehensive testing.
- Persistent Health Concerns: If any family member has respiratory issues or other health-related concerns that may be linked to radon exposure, a deeper investigation is warranted.
- Insurance or Real Estate Transactions: When
selling your home or changing insurance providers, it is often beneficial to have a professionally documented radon test.
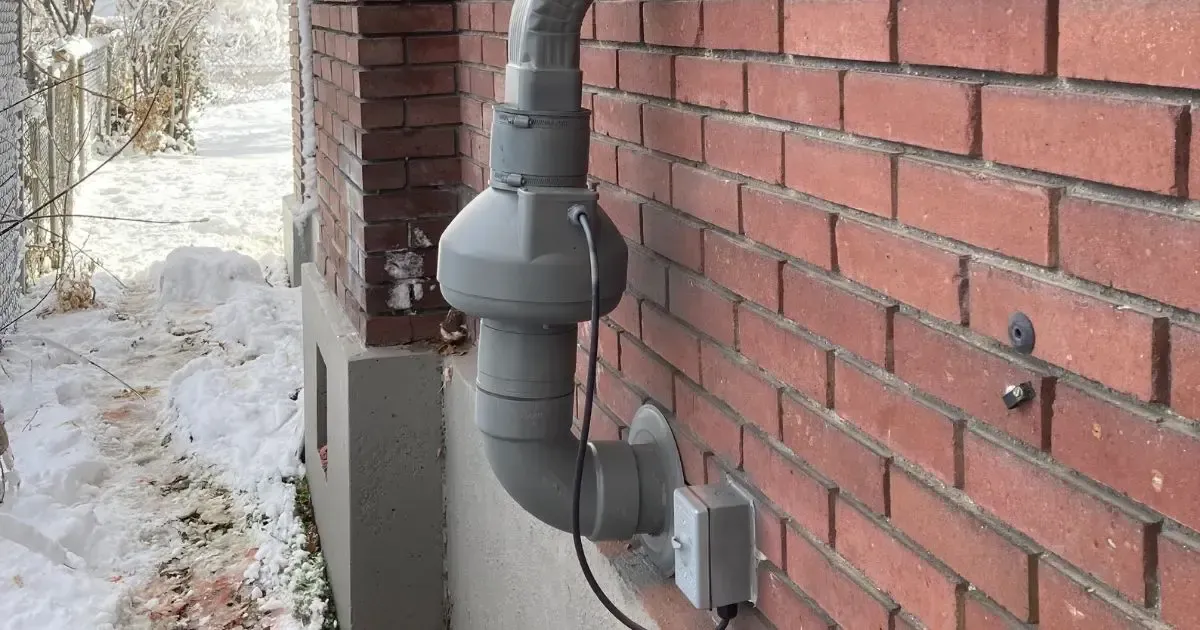
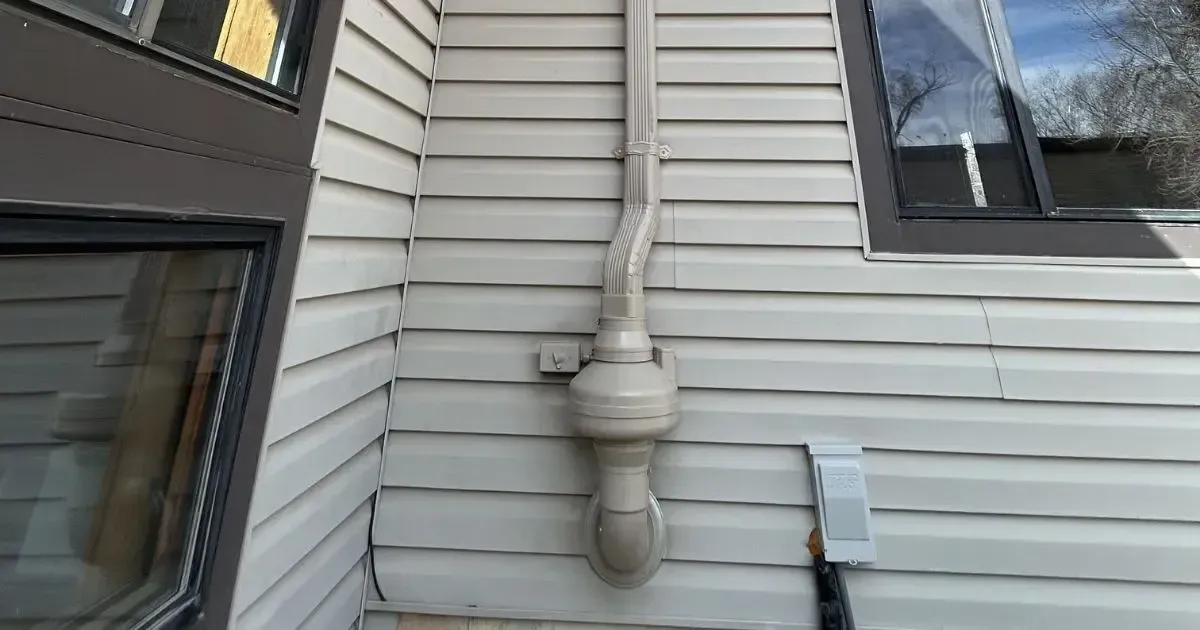
Professional radon mitigation experts not only provide accurate testing but also advise on the most effective strategies to reduce radon levels. They can suggest improvements such as sealing floors, installing ventilation systems, or other structural modifications that meet federal and state guidelines.
Maintenance and Future Prevention Strategies
Regular radon testing should be an integral part of your home maintenance routine, especially following changes in weather or home modifications. The following are long-term strategies to help maintain low radon levels:
- Annual Testing: Even if your radon levels are currently low, annual testing will allow you to
spot any unexpected changes over time.
- Seal and Insulate: Regularly inspect and seal any cracks or openings in your home’s foundation. Proper insulation not only improves energy efficiency but also minimizes radon entry points.
- Improve Ventilation: Consider installing passive or active ventilation systems. These systems help to exchange indoor air with fresh outdoor air, reducing radon concentration indoors.
- Professional Inspections: Schedule periodic professional inspections, particularly if you undertake major renovations that might affect the structure of your home.
In the long term, these proactive measures not only help in keeping radon levels low but also contribute to overall improved indoor air quality, leading to a healthier living environment.
Frequently Asked Questions
What Is Radon and Why Is It dangerous?
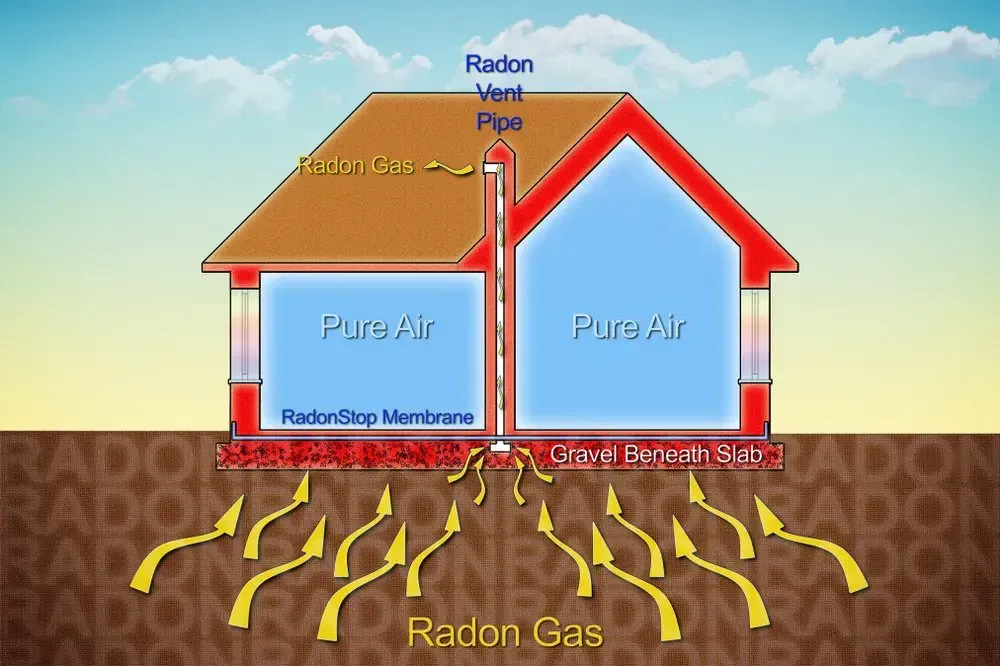
Radon is a radioactive gas that originates from the natural decay of uranium found in soil and rock. It is dangerous because it can accumulate in enclosed spaces, leading to prolonged exposure that increases the risk of lung cancer.
How Often Should I Test for Radon in My Home?
Experts recommend testing for radon at least once every two years. However, if there have been changes to your home’s structure, renovations, or if you live in a high-radon area, more frequent testing may be warranted.
What Factors Can Influence Radon Levels?
Radon levels can be influenced by:
- Seasonal temperature changes and barometric pressure
- Ventilation levels within the home
- Changes in the structural integrity of the building
- Local geological conditions
Can I Take Steps to Reduce Radon Levels Even If My Test Results Are Below 4 pCi/L?
Absolutely. Although levels below 4 pCi/L are generally considered safe according to EPA guidelines, reducing radon levels as much as possible further minimizes any potential long-term risks. Simple improvements like enhanced ventilation and regular sealing of foundation cracks can help maintain low levels.
What Should I Do If My Radon Levels Are High?
If your test detects radon levels at or above 4 pCi/L, it is advisable to consult with a professional radon mitigation expert. They can perform a more comprehensive assessment and recommend appropriate remediation techniques such as
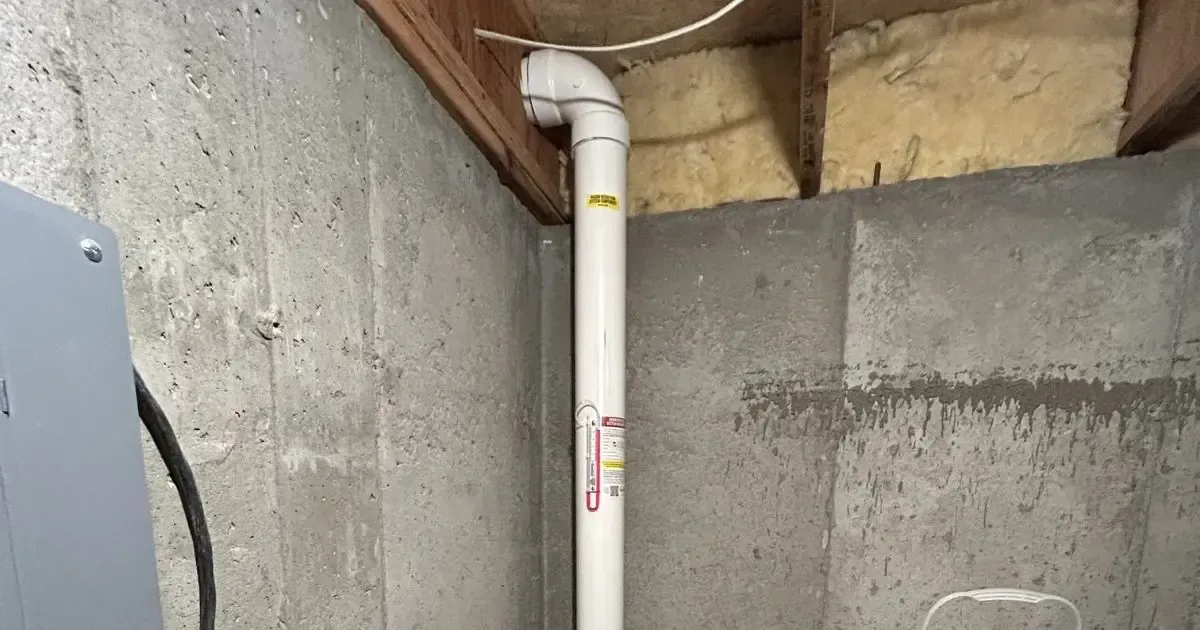
sub-slab depressurization, sealing, and improved ventilation.
Conclusion
Ensuring your home is safe from radon exposure is a critical step in maintaining a healthy living environment for you and your family. With the arrival of spring in Utah, it is an ideal time to perform a thorough radon check. From understanding the basics of radon and its associated risks to learning practical, step-by-step methods for testing and interpreting results, this guide has provided a comprehensive overview of the process and its importance.
Remember, regardless of whether initial tests show low radon levels, regular monitoring and preventive maintenance are key to long-term indoor air quality. Make it a part of your spring cleaning routine. If you find elevated levels or have any doubts about the safety of your indoor environment, don’t hesitate to seek professional help. Our team of radon mitigation experts is ready to assist you every step of the way with customized solutions tailored to your home’s needs.
For immediate assistance or to schedule a radon inspection, please
contact us or call our office. Protect your home and your family this spring – let our expertise ensure that every breath you take is safe and healthy.
Thank you for trusting our expertise in keeping Utah homes healthy. We look forward to helping you maintain a safe and comfortable living environment throughout the year.
Get a Free Quote
![Blue periodic table tile for radon, element 86, with symbol Rn and mass [222].](https://le-cdn.hibuwebsites.com/09c3a4288d5947b58ca8220076f73b94/dms3rep/multi/opt/radon-periodic-table-rn-86-radon-be-gone-1920w.webp)