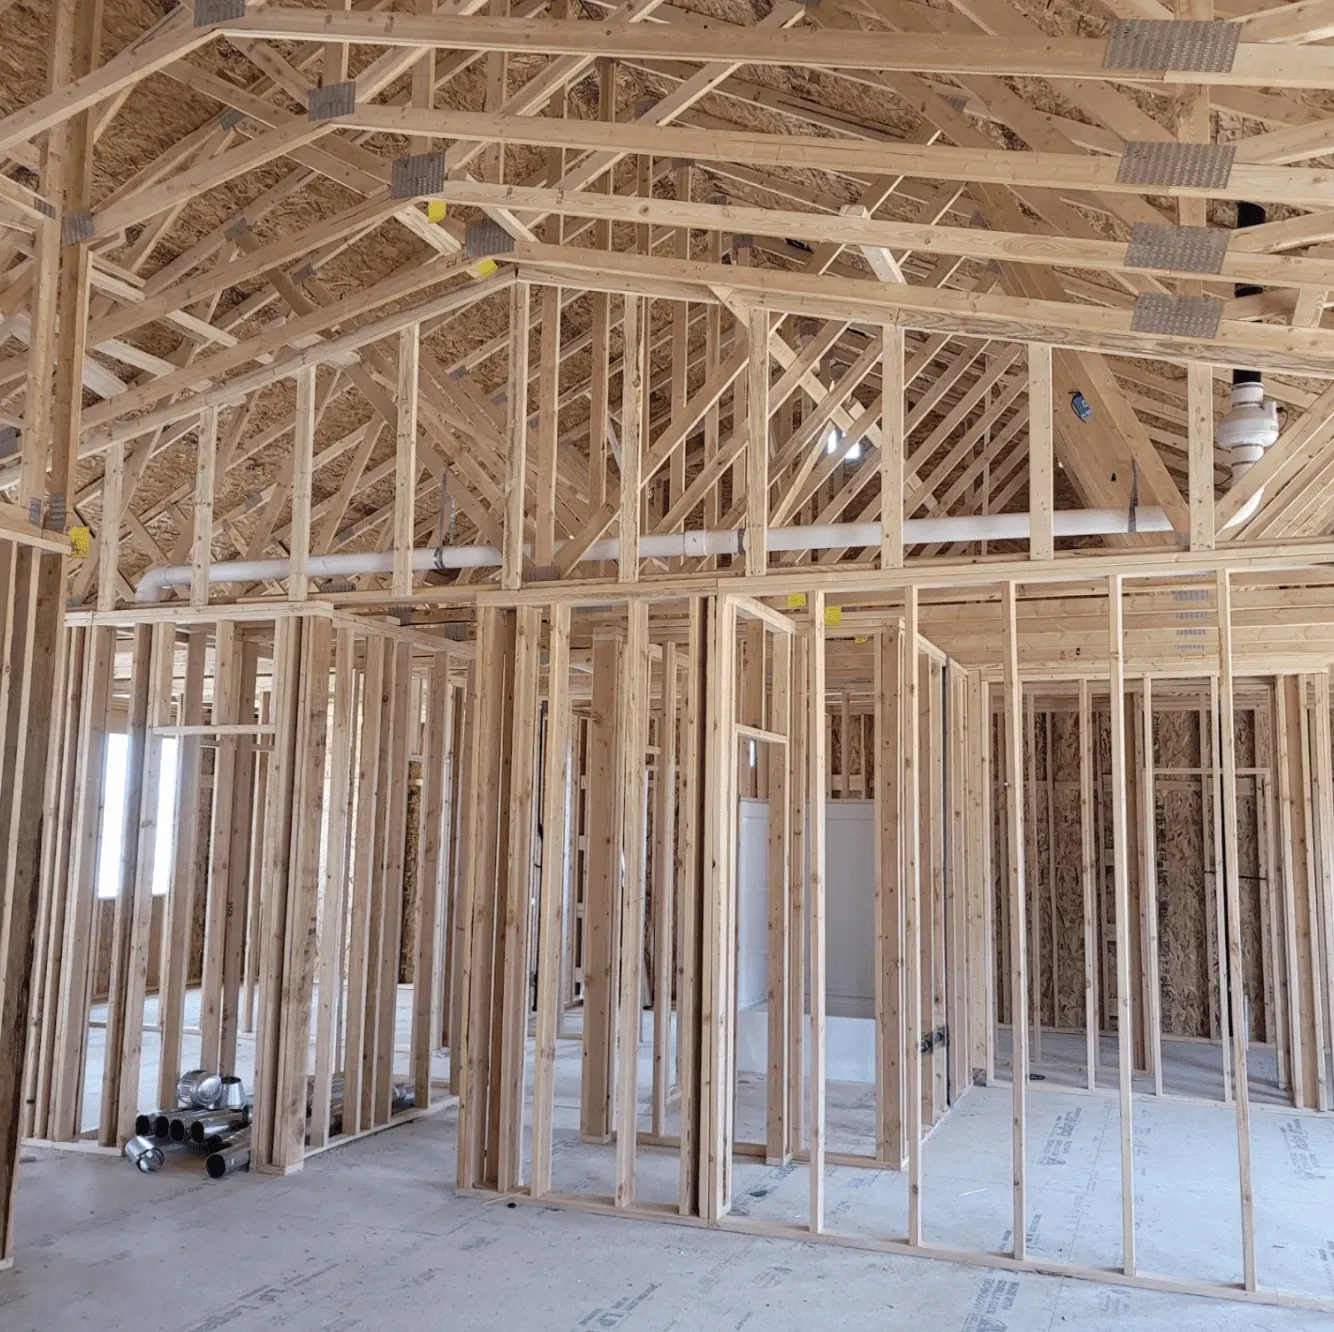
Radon is a naturally occurring radioactive gas that can seep into your home, posing a serious health risk. Knowing the typical timeline for radon mitigation can help homeowners understand what to expect during the process from initial assessment to final testing.
In this comprehensive guide, we provide detailed information about each phase of the radon mitigation process, including the duration involved, steps taken by professionals, and key milestones. Whether you’ve just discovered an elevated radon level or are proactively testing your home, this page will serve as your authoritative resource for radon mitigation timelines.
Get a Free Quote
Understanding Radon and Its Impact on Your Home
Radon gas is odorless, colorless, and tasteless, making it a hidden threat that can accumulate without detection. Prolonged exposure to high radon levels has been linked to lung cancer, which is why timely mitigation where necessary is crucial for your household. Before exploring the mitigation timeline, it is important to note:
- Why Testing Matters: Regular radon testing gives you a clear picture of your indoor air quality.
- Health Implications: Mitigating levels as early as possible can significantly reduce long-term
health risks.
- Real Estate Considerations: Properties with elevated radon levels may face challenges in the housing market.
If you suspect elevated radon levels, early intervention can help prevent long-term exposure.
Contact us today to schedule an assessment or to ask questions about the process.
The Radon Mitigation Process: A Step-by-Step Timeline
Radon mitigation is a multi-step process designed to reduce radon concentration to acceptable levels. Below is an overview of the typical timeline:
1. Initial Assessment and Testing
The process begins with an initial evaluation to determine the level of radon in your home. This stage typically includes:
- Preliminary Consultation: A brief discussion to understand your property and potential radon issues.
- Short-Term Testing: Usually conducted over a period of 2-7 days. A charcoal canister or an electronic radon detector is placed in your home to measure radon levels.
- Home Inspection: Our certified radon professionals conduct a visual inspection to note any factors that may contribute to radon ingress, such as cracks in the foundation.
This initial phase can take anywhere from one to two weeks, including scheduling and laboratory analysis.
Schedule your initial radon test to get the process started quickly.
2. Detailed Evaluation and Mitigation Planning
Once the initial test confirms elevated radon levels, a detailed evaluation is scheduled. During this phase, professionals design a customized mitigation system. Key activities include:
- Comprehensive Home Survey: An in-depth review of potential pathways for radon entry, including entry points around the foundation, crawl spaces, and utility penetrations.
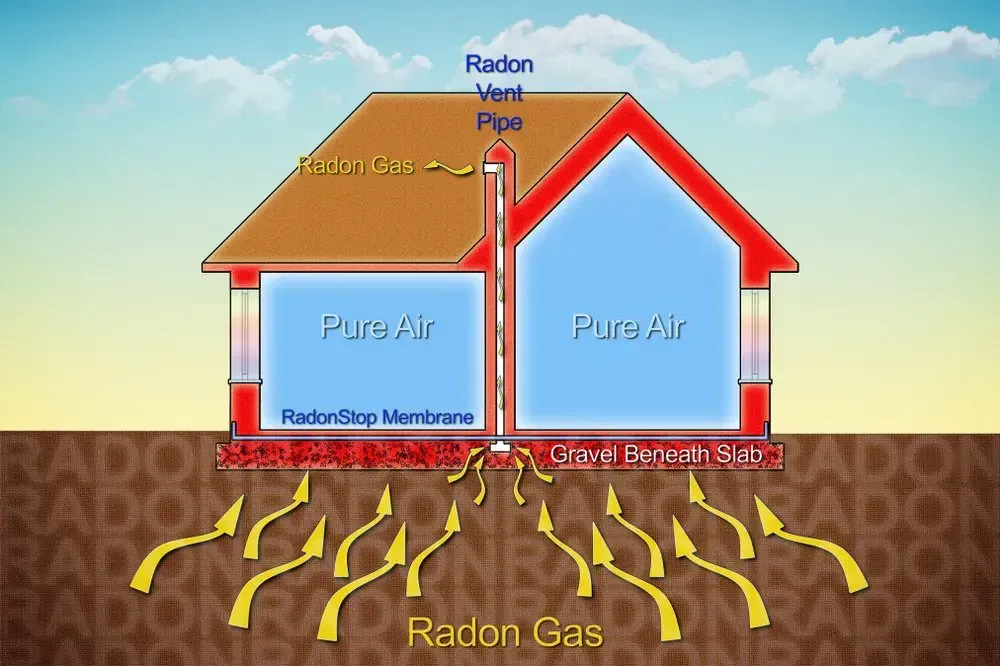
- Designing a Mitigation Strategy: Based on the survey, experts determine the most effective radon mitigation structure for your home. Options include sub-slab depressurization, block wall depressurization, and improvements to the home’s ventilation system.
- Customized Mitigation Plan: A thorough project plan is developed that outlines recommended improvements, equipment specifications, and a detailed timeline for installation.
This evaluation and planning stage usually takes an additional 1 to 2 weeks, depending on the complexity of the home structure. During this time, homeowners might be invited to review the plan and address any concerns with the mitigation professionals.
3. Installing the Radon Mitigation System
With a tailored plan in hand, the
installation of the radon mitigation system begins. The installation process is meticulously coordinated to minimize disruption to your daily life. The typical steps include:
- Preparation and Safety Measures: Professionals prepare the work area, ensuring all safety protocols are followed.
- System Installation: The installation of the sub-slab depressurization system or alternative system selected will typically involve:
- Drilling access points through the foundation or slab.
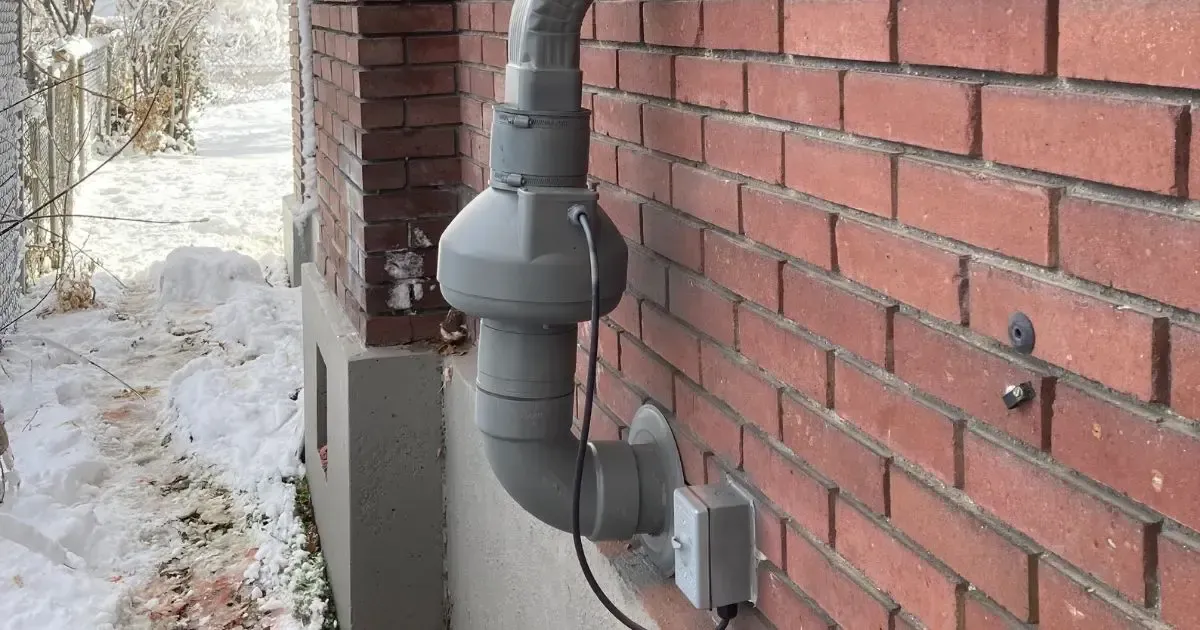
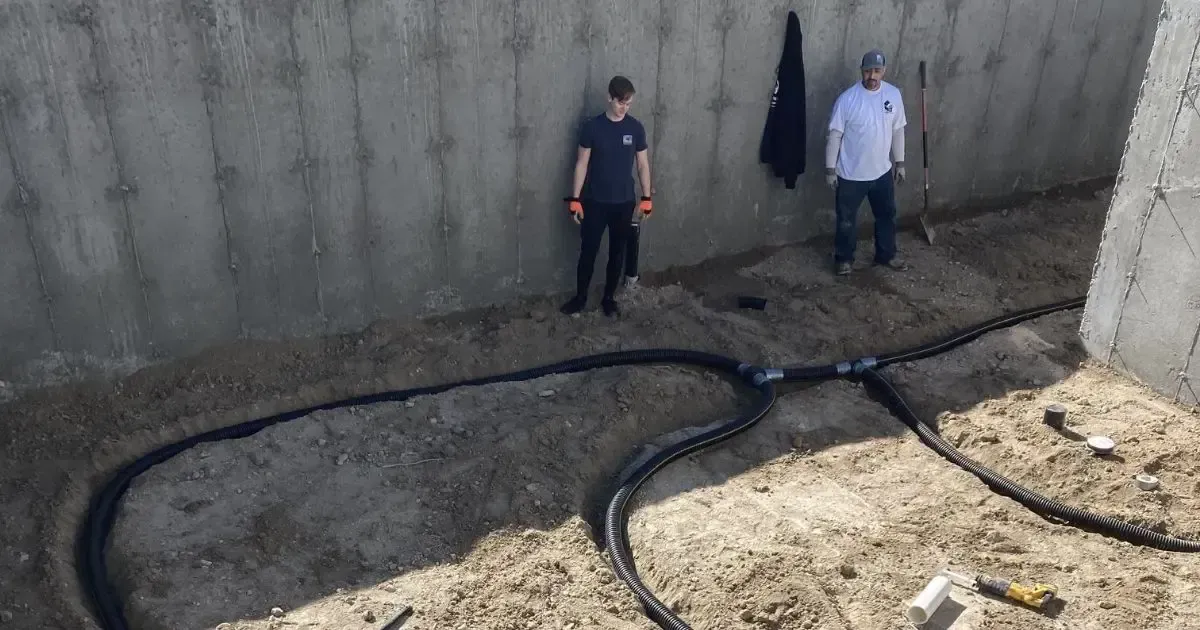
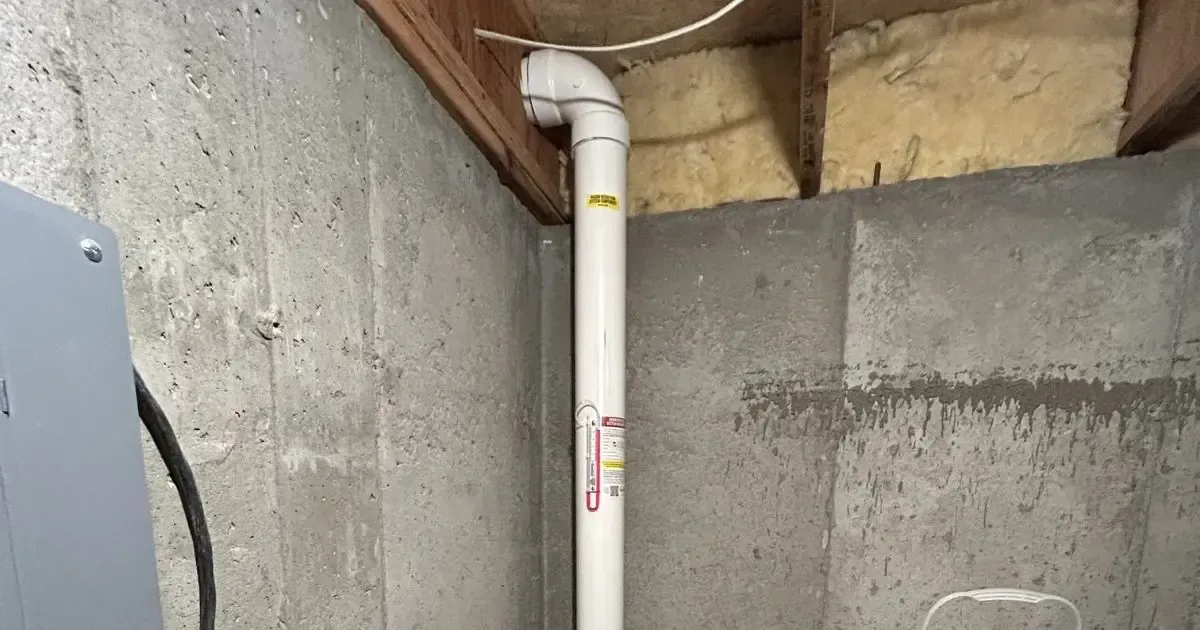
- Placement of pipes and fans directed towards the exterior of the building.
- Sealing any openings and applying barriers to prevent re-entry of radon.
- Quality Assurance and Verification: Continuous monitoring during installation ensures all components are placed correctly and safely.
The installation phase typically requires 1 to 3 days, depending on your home’s layout and the chosen mitigation method. If additional structural work is necessary, this phase might take a little longer. A follow-up inspection is conducted to confirm the integrity of the system and compliance with local guidelines.
4. Post-Installation Testing and Verification
After installing the mitigation system, thorough testing is critical to verify that the radon levels have been effectively reduced. Activities during this phase include:
- Initial Post-Installation Testing: Short-term tests (2-7 days) are repeated to measure the effectiveness of the new system.
- Data Analysis: Professionals analyze the results to confirm that the radon reduction is within safe limits (typically below 4 pCi/L).
- System Adjustments: If levels are still high, minor modifications and adjustments may be necessary to optimize system performance.
This final testing phase generally takes an additional 1 to 2 weeks, factoring in the testing duration and scheduling time for any necessary adjustments. The clear end-goal of this phase is to bring radon levels to a safe threshold for your family’s peace of mind.
Factors Influencing the Radon Mitigation Timeline
While the aforementioned timeline provides a general overview, several factors may affect the total duration of radon mitigation in your home. Understanding these factors will help you manage expectations and plan accordingly:
- Home Size and Layout: Larger homes or those with complex layouts may require more time for both assessment and installation.
- Severity of Radon Levels: Higher initial readings could necessitate a more comprehensive system, leading to longer planning and installation times.
- Local Regulations: Compliance with state or local guidelines may extend the timeline, especially if additional permit approvals are needed.
- Weather and Seasonal Conditions: External climate conditions can sometimes influence scheduling, particularly if weather-sensitive work is being done outdoors.
- System Complexity: When custom solutions are required (such as integrating radon mitigation with heating or cooling systems), the installation process might be more intensive.
By understanding these influencing factors, homeowners can better plan for the process and have realistic expectations regarding the timeline. Regular communication with your radon mitigation professionals can also help ensure that any potential delays are promptly managed.
Get a Free Quote
Why Timely Radon Mitigation is Essential
Delaying radon mitigation can have significant impacts on your health and property value. It is not only about meeting regulatory guidelines but also about ensuring that you and your family are protected from harmful exposure. Consider the following key benefits of timely radon mitigation:
- Health Protection: Lowering radon levels reduces the risk of lung cancer and contributes to overall indoor air quality.
- Property Value: Homes with effective radon mitigation measures are more attractive to buyers, ensuring that your property holds its value.
- Peace of Mind: Knowing that your home is safe and compliant with health standards brings immense relief and confidence.
- Energy Efficiency: In some cases, improvements in air flow and ventilation can have positive side effects on your home’s energy efficiency.
Don’t wait until radiological concerns escalate. If your radon levels are above recommended limits, act quickly.
Schedule a consultation with our radon mitigation experts to secure your home and your health.
Frequently Asked Questions
Often, homeowners have several questions about what they can expect during the radon mitigation process. Addressing these concerns upfront helps in making an informed decision. Here are answers to some commonly asked questions:
How Soon After Installation Can I Expect Reduced Radon Levels?
While many systems begin to lower radon levels immediately upon activation, it generally takes a few days to a couple of weeks for post-installation testing to confirm sustained safety levels. It is essential to carry out follow-up tests to ensure the system is performing as designed.
Is Additional Maintenance Required For The Radon Mitigation System?
Yes,
routine maintenance ensures that your system remains effective over time. This can include periodic fan checks and system inspections to verify that seals and pipes are intact. Our experts advise scheduling annual inspections as part of your home’s upkeep.
Will Radon Mitigation Affect My Home’s Aesthetics?
Radon mitigation systems are designed with functionality in mind. Most components, such as the fan and piping, are installed discreetly and hidden from plain view. With careful planning, the system will not impact your home’s visual appeal or structural integrity.
Can I Install a Radon Mitigation System On My Own?
Radon mitigation should only be carried out by certified professionals. DIY installations may not meet local regulations or effectively reduce radon levels, potentially exposing your household to ongoing risks. Relying on professional expertise ensures that the system is properly designed and installed for maximum efficiency.
What Are The Long-term Benefits of a Radon Mitigation System?
Once installed, a properly maintained radon mitigation system provides lasting protection against radon exposure. This contributes to a healthier indoor environment and can also increase the resale value of your home by ensuring compliance with health regulations.
Detailed Timeline Recap: From Start to Finish
For a quick overview of the timeline, the following steps summarize the entire process:
- Initial Assessment and Testing: 1 to 2 weeks, incorporating scheduling and lab analysis.
- Detailed Evaluation and Planning: 1 to 2 weeks, during which a custom mitigation plan is developed.
- System Installation: Typically 1 to 3 days, largely contingent on home layout and system complexity.
- Post-Installation Testing and Verification: 1 to 2 weeks for thorough testing and any necessary adjustments.
In total, the radon mitigation process can range from about 3 to 6 weeks from the initial consultation to the final confirmation of reduced radon levels. It is important to note that specific timelines may vary, and continuous communication with your mitigation team will help manage expectations throughout the process.
Final Thoughts: Taking the First Step Towards a Safer Home
Radon mitigation is not simply a service—it is a commitment to the long-term safety and well-being of your household. By understanding the timeline and each step involved, you can plan appropriately and feel confident in the process. Our comprehensive approach ensures that every aspect of radon mitigation, from the initial test to the final clearance, is executed with precision and care.
Remember, timely mitigation can mean the difference between a safe home and prolonged exposure to radon. Taking action early not only protects your health but also enhances your home’s overall value and comfort. Explore our website for more details about
our services, read customer testimonials, and
blogs for further insights on indoor air quality management.
Get a Free Quote
![Blue periodic table tile for radon, element 86, with symbol Rn and mass [222].](https://le-cdn.hibuwebsites.com/09c3a4288d5947b58ca8220076f73b94/dms3rep/multi/opt/radon-periodic-table-rn-86-radon-be-gone-1920w.webp)