Radon Pipe Routing: From Basement to Attic
Radon Pipe Routing: From Basement to Attic
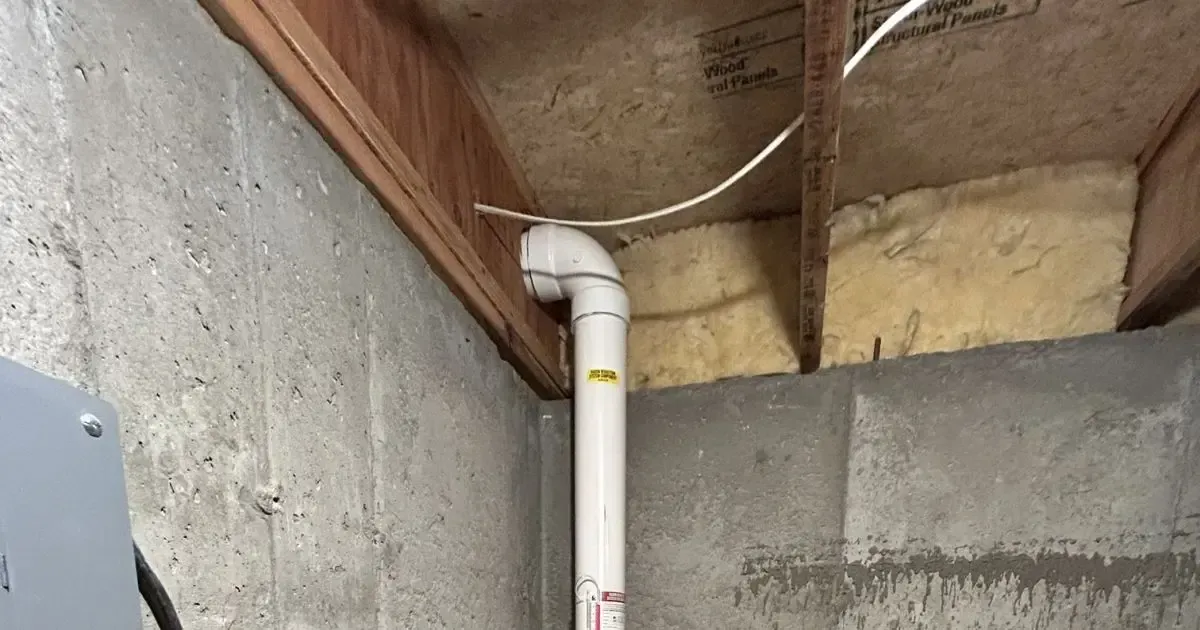
Radon gas is a naturally occurring element that can seep into homes from the ground and pose health risks if not properly managed. Installing an effective radon mitigation system is essential, and one of the critical components is the radon pipe routing, which channels radon gas from the source in the basement up to a safe discharge point in the attic. This guide provides a comprehensive overview of radon pipe routing, detailing best practices, installation tips, code compliance, and the benefits of proper system design.
Understanding the Importance of Proper Radon Pipe Routing
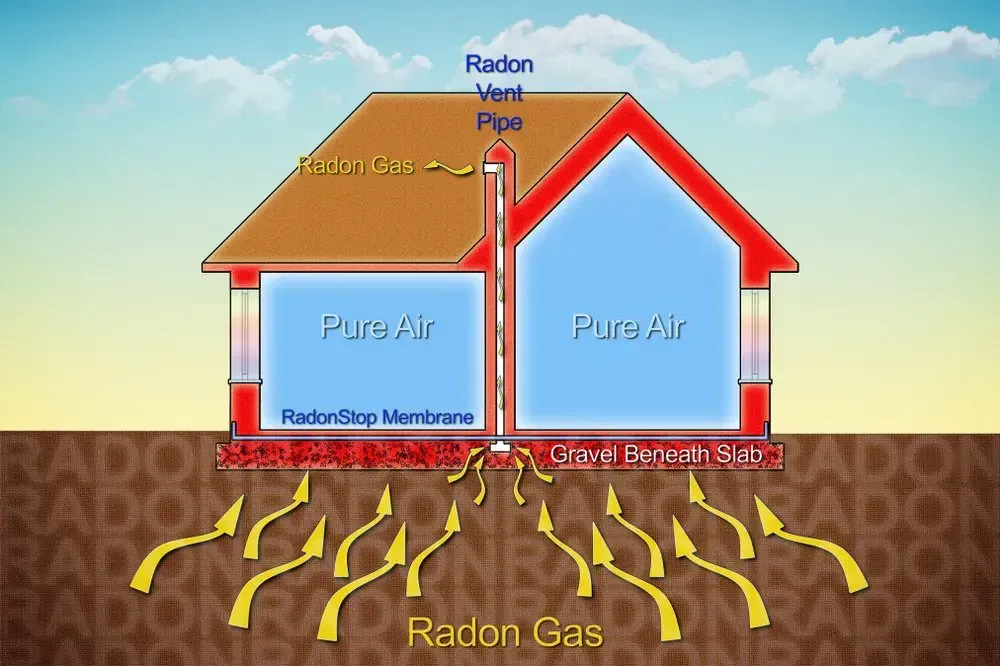
Radon mitigation systems work by extracting the gas from beneath the home and safely venting it outdoors away from windows, doors, and other openings. The routing of the radon pipe is fundamental to the entire process for several reasons:
- Effective Extraction: A well-routed pipe ensures that the gas is efficiently drawn from the ground and directed to the discharge point.
- Code Compliance: Local building and safety codes mandate certain installation standards to maximize safety and efficiency.
- Aesthetic Considerations: Careful routing minimizes visual disruptions within the living space.
- System Longevity: Correct installation practices reduce the risk of future maintenance issues and system failures.
Throughout this page, you will learn how to design and install a reliable radon pipe routing system, understand the necessary regulatory guidelines, and receive practical tips to ensure your home remains a safe shelter free of harmful radon gas.
Basics of Radon Mitigation and Pipe Routing
Before diving into the details of radon pipe routing, it’s helpful to understand the overall mechanics of a radon mitigation system. The core components include:
- Sub-Slab Depressurization: This process involves creating a channel that allows radon gas to be safely extracted from beneath the home’s foundation.
- Stable Extraction Point: The extraction point, often located in the basement, is where the suction is applied to draw radon gas.
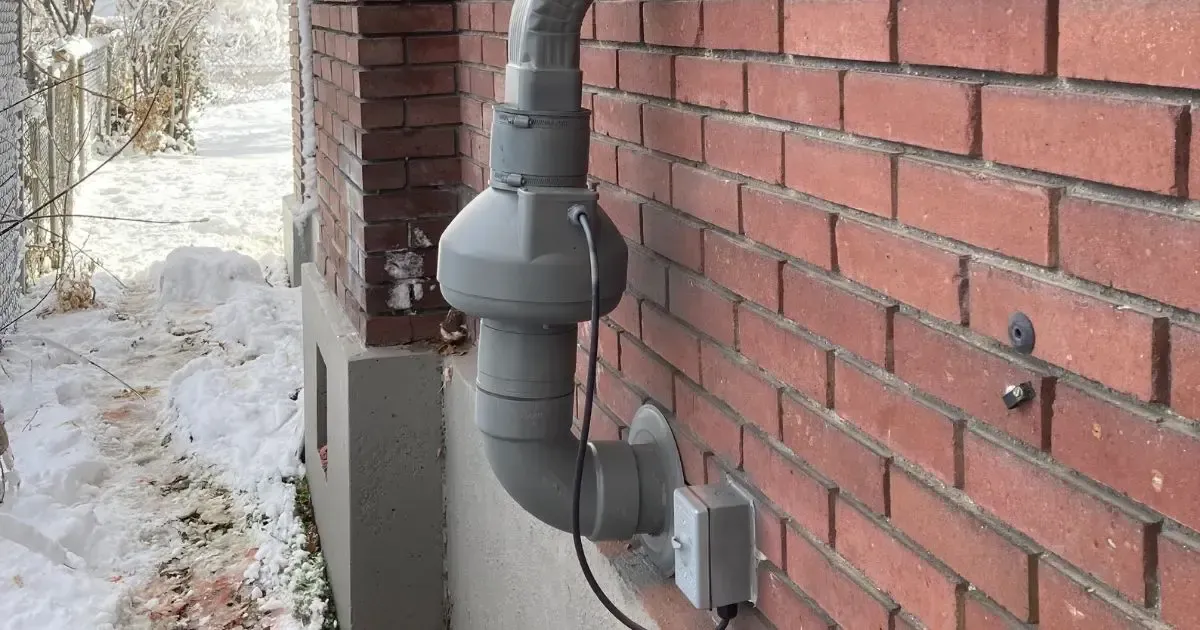
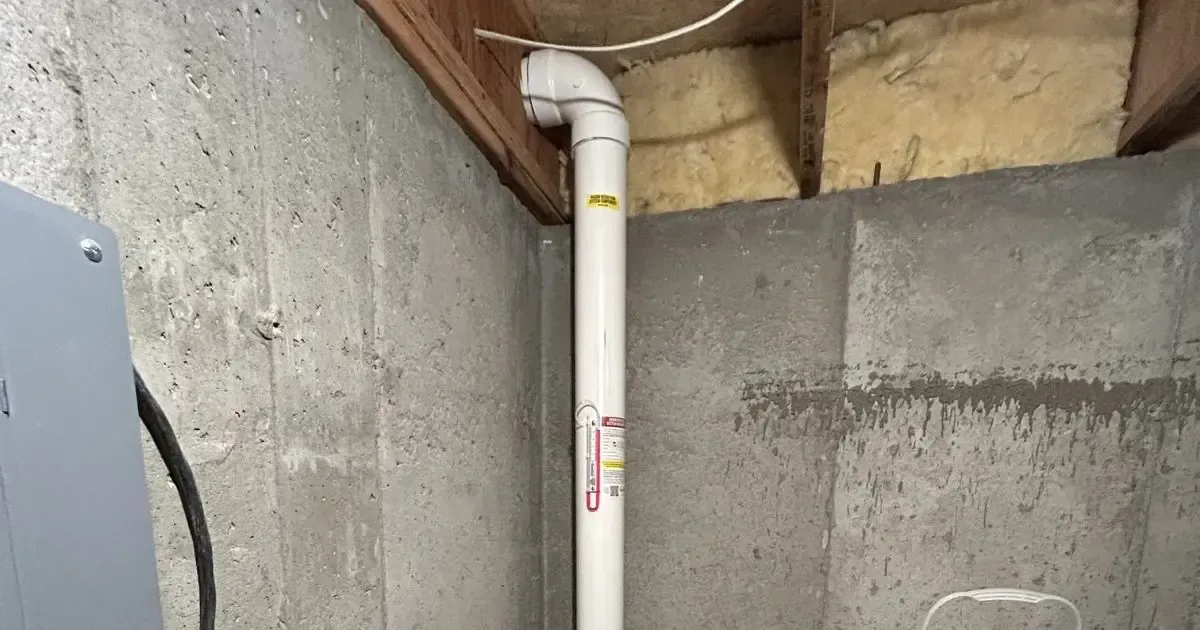
- Exhaust Venting: The gas is vented through a pipe that travels from the basement and ideally exits through the attic or roof, releasing the gas high above ground level.
Understanding these components underpins the importance of reliable pipe routing, ensuring that every part of the system works efficiently and safely.
Step-by-Step Process: From Basement Extraction to Attic Discharge
1. Initial Assessment and Planning
Prior to installation, a thorough assessment of your property is essential. This involves:
- Conducting a radon test to determine the gas concentration and areas of high accumulation.
- Reviewing building blueprints or performing an inspection to identify potential obstacles and optimal pipe routing paths.
- Consulting local codes to understand the permissible discharge points and routing requirements.
This initial planning phase sets the stage for a successful radon mitigation project. A clear assessment ensures that all challenges are identified early, making it easier to plan a route that avoids obstructions and complies with local regulations.
2. Basement Extraction Techniques
The basement serves as the starting point for many radon mitigation systems. The focus during the installation in the basement should be on:
- Site Preparation: Ensure that the area is free of debris and that any cracks in the foundation are sealed or properly managed.
- Installation of a Suction Point: A sealed opening is created where the radon gas is collected. Here, it is crucial to ensure an airtight environment to maintain a stable extraction process.
- Connection to the Pipe: The pipe is securely connected to the suction point to begin the upward journey of radon gas. It’s important to use materials that are resistant to corrosion and degradation over time.
3. Routing Through the House
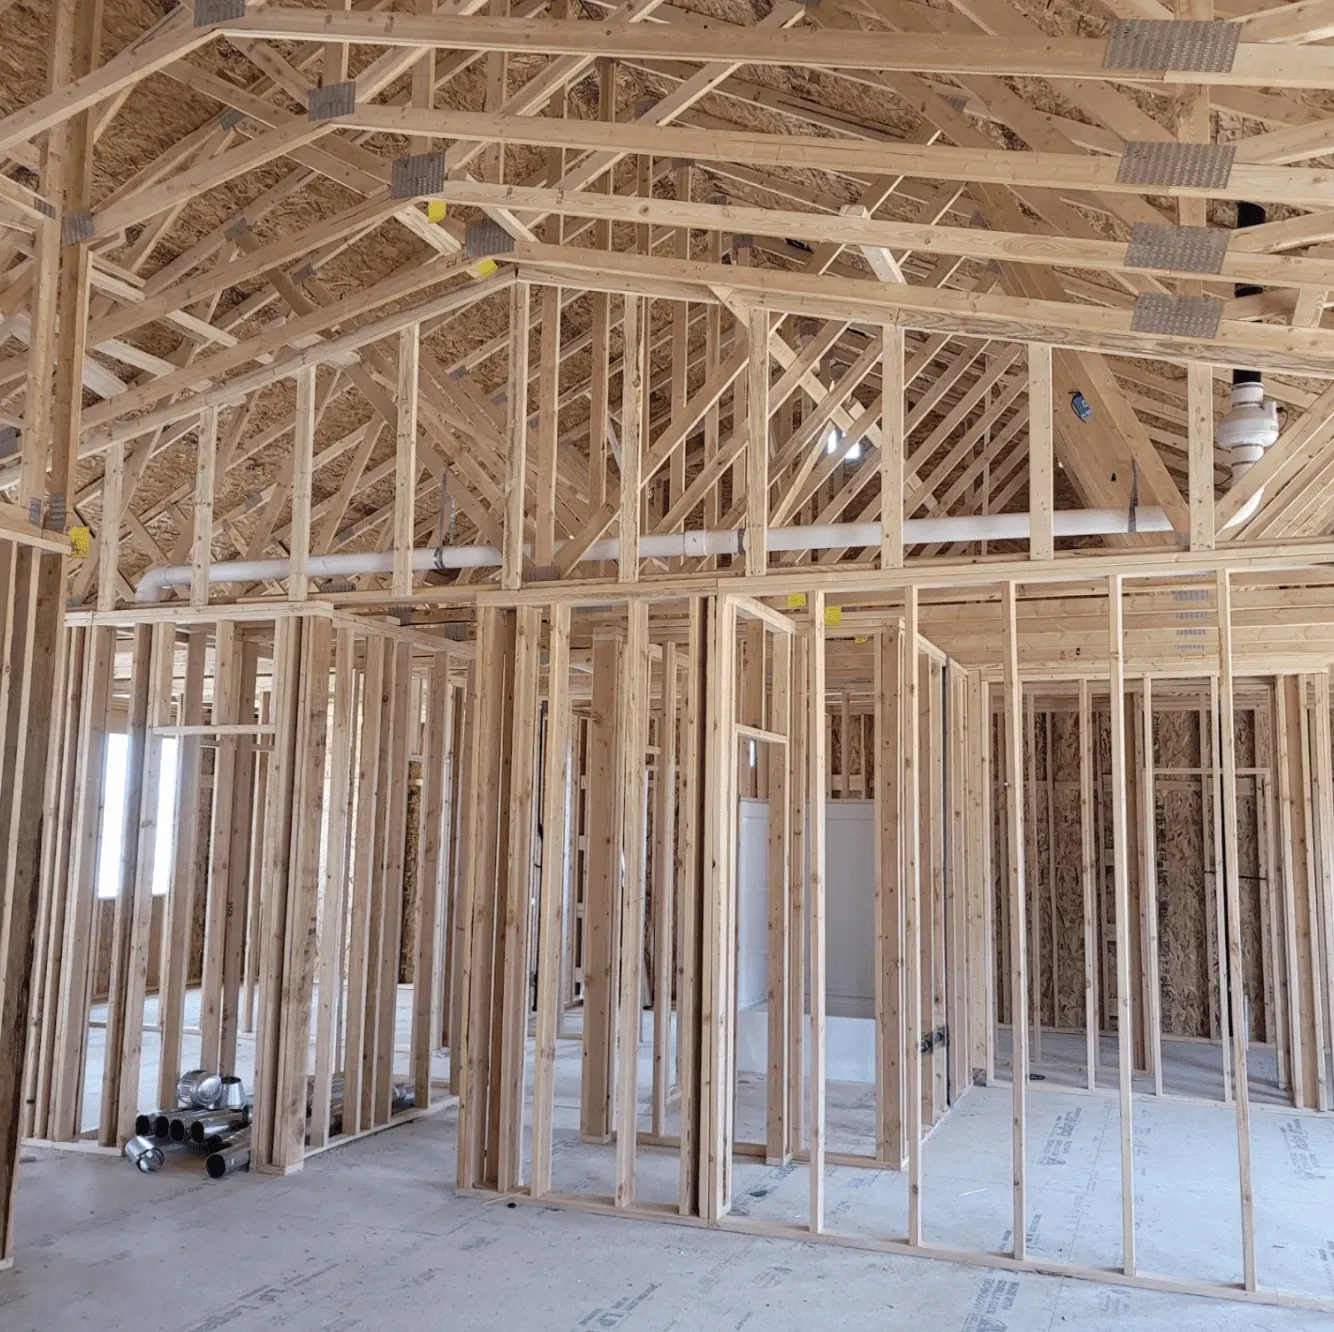
After establishing the extraction point in the basement, the next step is to carefully route the pipe through the house to reach the attic. Key considerations include:
- Structural Considerations: The pipe should navigate along walls, through ceilings, and around wiring or plumbing installations. Avoid routing where the pipe might be accidentally damaged or where building renovations could later interfere with it.
- Thermal Insulation: Pipes running through heated areas should be insulated to prevent condensation. Insulation helps maintain the efficiency of the system by preventing heat loss and potential moisture issues.
- Accessibility: Ensure that the pipe is accessible for future inspections or repairs, yet discreet enough not to distract from the decor or living space.
4. Attic Discharge and Final Venting
The ultimate discharge point is the attic, where the radon gas is released safely high above ground level. Important steps here include:
- Locating an Optimal Outlet: The pipe should be directed to a location in the attic that meets local building guidelines, typically ensuring that the gas is expelled far from windows, doors, and air intakes.
- Sealing and Flashing: Ensure the point of vent exit is properly sealed and flashed to avoid any water leaks during adverse weather conditions.
- Final Inspection: A thorough post-installation inspection ensures that there are no leaks, obvious sagging in pipe alignment, or other installations issues that might compromise the system’s integrity.
This stage often serves as a final check to ensure the entire mitigation system functions seamlessly. It is advisable to schedule a final inspection with a certified radon mitigation specialist to confirm that all components, especially the attic discharge, meet code requirements and function optimally.
Best Practices and Installation Tips
Bringing together the fundamentals of radon pipe routing, here are several best practices and installation tips to maximize the effectiveness and longevity of your system:
- Use High-Quality Materials: Select pipes and sealing elements that are specifically designed for radon mitigation. Durable materials reduce the risk of deterioration over time.
- Secure Pipe Fastenings: Ensure that the pipe is securely fastened at regular intervals. Loose sections can disrupt airflow and lead to ineffective radon removal.
- Maintain Clear Paths: Avoid routing pipes through areas with heavy foot traffic or where accidental impact might occur. Keeping the path clear not only protects the pipe but also simplifies future inspections and maintenance.
- Regular Maintenance and Inspection: Once the radon mitigation system is installed, schedule periodic checks to ensure that connections remain intact and that the system continues to operate efficiently.
- Document the Routing: Keeping detailed records and photos of the installation process is beneficial for future maintenance and troubleshooting. This documentation may also be required during property sales or inspections.
Ensuring Code Compliance and Safety Standards
Local building codes and safety regulations are in place to safeguard homeowners and ensure that radon mitigation systems do not introduce new risks. Key points for code compliance include:
- Proper Discharge Location: The final discharge point must be situated so that radon gas does not re-enter the home through windows, doors, or ventilation systems.
- Vent Pipe Height: Many jurisdictions specify that the vent pipe must extend a certain distance above the roofline or measure at a specific height to effectively disperse radon gas.
- Sealing of Openings: Openings created during the installation process must be securely sealed to prevent air leakage, thus ensuring that the pressure differential required for mitigation is maintained.
- Inspection and Certification: It is highly recommended that the completed installation be inspected by a certified radon mitigation professional. Certification not only ensures compliance with local codes but also provides peace of mind regarding the system’s performance.
During your installation project, keep your local regulations and certification requirements in view. A clearly labeled checklist of code compliance tips might prove invaluable during both installation and final inspection stages.
Common Challenges and Troubleshooting Tips
While many radon mitigation installations proceed without incident, challenges can arise during pipe routing. Understanding common issues and troubleshooting tips can help you avoid or quickly resolve problems:
- Pipe Obstructions: Survey the home early and frequently during installation for any unforeseen obstructions, such as hidden wiring routes or spaces occupied by insulation. Adjust your routing accordingly.
- Air Leaks: Even small leaks in the radon pipe can compromise system efficiency. Regularly check seals and joints and be prepared to reapply sealant or adjust fittings if necessary.
- Condensation and Moisture: Moisture buildup inside the pipe can lead to corrosion or blockages. Insulate pipes when they pass through temperature-variable spaces, and ensure proper sealing to maintain a stable internal environment.
- Structural Interferences: Homes built over many years can have unpredictable internal structures. Patience and flexibility in planning the route are key to ensuring that the pipe does not interfere with critical load-bearing walls or utility systems.
For those facing challenges, our team is available to offer personalized advice.
Enhancing Your Home’s Safety and Value
An effectively installed radon mitigation system does more than just protect your health—it also contributes to the overall safety, efficiency, and market value of your home. When potential buyers see that a home has taken responsible steps to mitigate radon risks, they often view it as a well-maintained investment.
Here are the key advantages of investing in proper radon pipe routing:
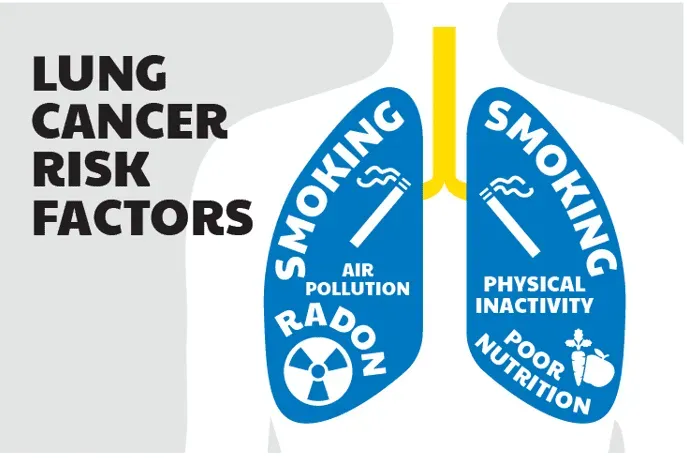
- Health Protection: Reduced radon levels directly correlate to a lower risk of lung cancer and other health concerns.
- Increased Home Value: Homes with certified radon mitigation systems are viewed favorably on the real estate market, potentially leading to higher resale values.
- Long-term Reliability: By using durable materials and following best practices, you create a system that functions effectively for years, reducing the need for costly repairs.
- Certain Peace of Mind: Knowing that your home is compliant with local safety codes alleviates concerns during inspections, maintenance, and even during natural events like storms.
In addition to these benefits, many local health departments offer incentives or rebates for radon mitigation. Always consult with local authorities to learn how your investment might provide not only immediate health benefits but also long-term financial advantages.
Maintenance, Monitoring, and Follow-Up
Maintenance is critical to ensure your radon mitigation system continues operating at peak performance. Even the best-installed systems require periodic attention to detect changes and address issues before they escalate.
Follow these maintenance and monitoring tips:
- Regular Inspections: Schedule an annual or bi-annual inspection with a certified technician to check that the radon extraction and venting system remains airtight and effective.
- Monitor Radon Levels: Periodically test your home’s radon levels. Even after installation, fluctuations in radon concentration can indicate potential issues in the system.
- Document Any Changes: Maintain records of inspection dates, maintenance activities, and any repairs performed. This documentation is not only useful for long-term care but also adds value when selling your home.
- Respond Promptly to Alerts: If your radon concentration starts to spike or if you notice any physical changes in the installation, such as pipe sagging or disconnected joints, contact a professional immediately.
Our Commitment to Excellence in Radon Mitigation
At our company, we understand the challenges that come with radon mitigation. Our team of certified professionals is dedicated to providing thorough, budget-friendly, and reliable solutions. With years of experience in residential and commercial radon mitigation, we specialize in:
- Comprehensive site assessments and radon testing
- Expert installation of radon extraction and venting systems
- Customized routing solutions that minimize impact on your home’s interior
- Ongoing maintenance and emergency troubleshooting services
Our approach is not one-size-fits-all; we tailor every installation to the unique conditions of your home, ensuring that your radon mitigation system is both effective and unobtrusive. If you have any questions or need further guidance on radon pipe routing, please do not hesitate to Contact Us for a free quotation. Our friendly experts are always ready to assist!
Conclusion
Radon pipe routing, from basement extraction to attic discharge, is a critical process that demands careful consideration and expert execution. By following best practices in planning, installation, maintenance, and compliance, you directly protect your family’s health and enhance the overall value of your home.
We hope this comprehensive guide provides you with the valuable insights you need to understand and successfully navigate the complexities of radon pipe routing. With the right materials, expert guidance, and commitment to maintenance, you can maintain a safe and healthy environment in your home.
For more detailed advice, personalized solutions, or to schedule an assessment, please contact our radon mitigation experts today. Your safety is our priority!
![Blue periodic table tile for radon, element 86, with symbol Rn and mass [222].](https://le-cdn.hibuwebsites.com/09c3a4288d5947b58ca8220076f73b94/dms3rep/multi/opt/radon-periodic-table-rn-86-radon-be-gone-1920w.webp)